

I have lived without anything behind my bathroom basin for too long. I decided that what I needed was a shiny glass splashback. Some of you will already know that I love a DIY project, I’ve previously written posts about home improvements for empty nesters and easy tiling. So I gave the room a fresh coat of paint and started researching coloured splashbacks.
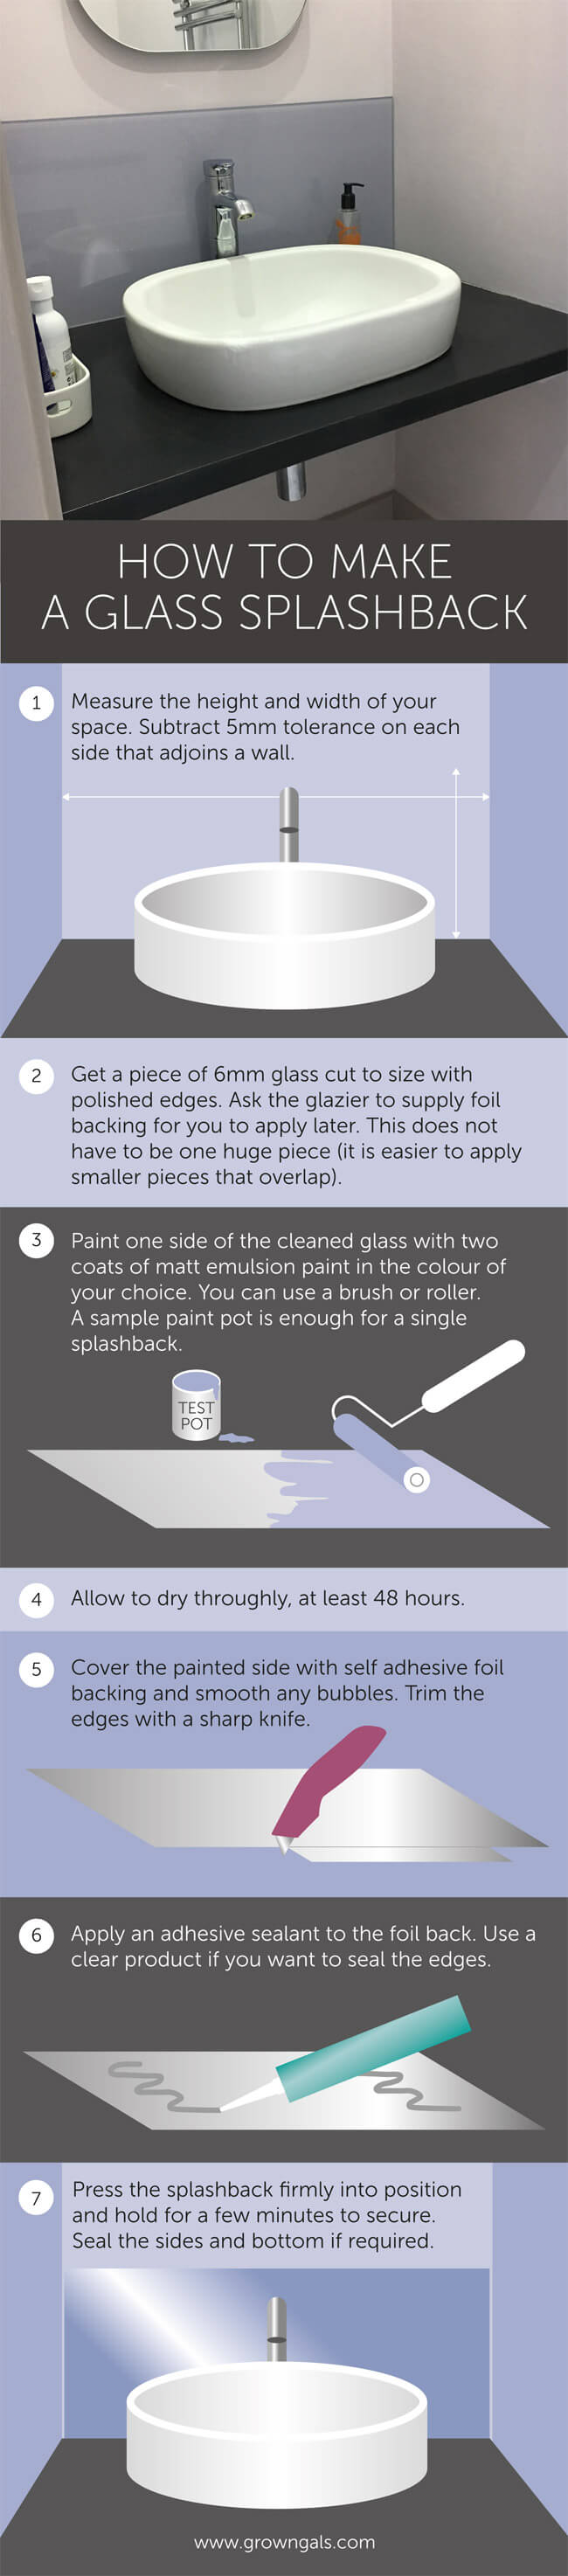
It’s not hard to find a bespoke glass splashback online but I just fancied having a go myself. In the end it cost me exactly half the price of the cheapest online quote. I did have a friendly glass cutting service nearby which made it very easy. I’ve included an infographic of the process in case you want to make want too. A more detailed step-by-step follows on below.
Measure the size of the glass splashback
If the glass will sit in a recess between two walls you will need to allow a few millimetres either side just in case the walls are not straight. I live in an old house so I deducted 5mm tolerance either side and once fitted this space looks fine. You can always fill the gap later with clear sealant if you want.
Get some glass cut to size
The glaziers may need a day or two so don’t expect it while you wait. I used 6mm glass which is what they recommended and I was glad because it felt nice and sturdy to handle. You will need all the edges polished smooth for easy handling. Some sites suggest using toughened glass but this is only necessary if the glass splashback is going to be in direct contact with heat, for instance behind a hob.
Finally it is a good idea to waterproof the back so tell the glazier what you are making and ask for some adhesive foil backing. You don’t need it in one big sheet because no-one will see it.
Paint it
This is the fun bit – choosing a colour to paint the glass splashback. I used a colour a couple of shades darker than my walls. The good news is, unless you’re doing a huge area, one small sample pot will be sufficient. Make sure the glass is super clean and paint one side using a brush or roller. I used a small brush and vinyl matt emulsion in a gorgeous lavender colour. I gave it two coats allowing it to dry for four hours in-between.
After the second coat allow to dry thoroughly for at least 48 hours – you don’t want to seal in any moisture.
Cover the painted side with the foil backing. You won’t see this so don’t worry about a few bubbles or overlapping strips. Smooth as much as possible with the back of a spoon (but don’t press too hard remember it’s glass). Once covered you will need to trim off the excess with a craft blade. The foil is quite thick and the knife can drag if you are not careful. You might find it easier to use the side of the knife instead of the point (a bit like trimming round a pie tin).
Stick the glass splashback in place
I asked for advice in my local DIY shop and bought a clear sealant adhesive (C tec-1) which would fix the glass splashback and also seal the bottom edge to prevent water dripping down the back of the basin shelf. You’ll need a sealant dispenser gun but this should be easy enough to borrow from a neighbour if you don’t have one. Spread the sealant liberally – I made a thick squiggle at each end and one in the middle. Position the splashback at an angle resting on the surface so that you can get it centered. Once you are happy you can press it against the wall and hold it there for a few minutes. If you want to seal the sides and the bottom run a small bead of sealant along the edges and smooth off any excess with a damp cloth whilst it’s still wet.
Ta da – all done!
Avril x


